- OPMAATZAGEN.nl
- Do it yourself
- DIY Projects
Furnish your garden shed yourself with OSB wall cladding, by Koen
Furnish your garden shed yourself with OSB wall cladding, by Koen

Create this project yourself with sheet material cut to size by OPMAATZAGEN.nl!

Koen designed this entirely themselves: from cutlist to finish. Get inspired by the materials used below — and then think about how you would tackle it. We make sure the wood is accurate to the millimetre; the rest is up to you.
A practical layout for your garden shed with OSB
Your garden shed is a handy place for garden tools, DIY materials, and small jobs. But it is with well-thought-out interior cladding that you truly turn it into your own workspace. Koen tackled this entirely on his own: using custom-cut OSB 3 of OPMAATZAGEN.nl, he clad the interior walls of his wooden garden shed. An achievable DIY project that shows you just how much difference large, simple wall panels can make.
What do you see in the photos?
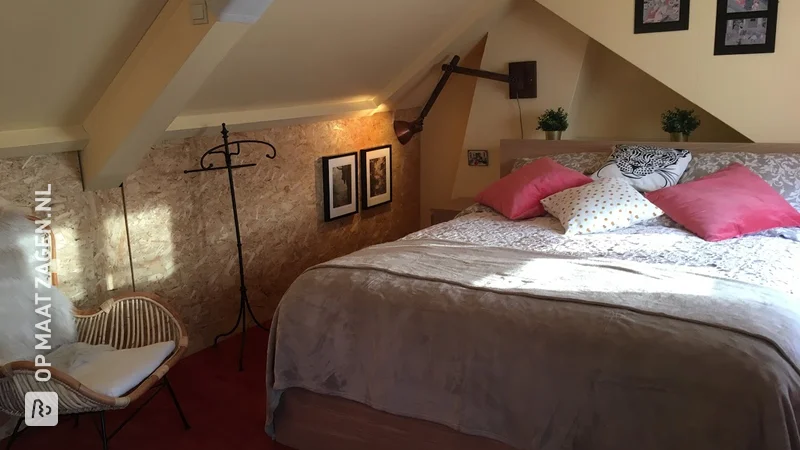
You see a wooden garden house with a sloping gable roof, visible roof beams, and wooden roof boards. Large, rectangular OSB panels with predominantly vertical seams are mounted against various interior walls. The light yellow to beige wood tones and the recognizable texture of compressed wood chips remain visible. The panels appear unpainted. In several places, you can see screw heads used to attach the wall cladding.
The OSB cladding extends to just below the roof structure. The triangular sections under the ridge retain the original wooden planks. At the bottom, a strip of the wooden framework is still visible in several places, above which is a dark grey tiled floor with light grout. This contrast between the dark floor and the light wall panels makes the layout clearly visible.
A workspace in the middle of the garden
Through the open wooden door, you look out onto the grass and a paved area next to the garden shed. The glass in the door lets in daylight. Inside the space, you can see toolboxes, a workbench, a ladder with a work platform, garden tools, and loose pieces of wood, among other things. The photos therefore show a garden shed that is being fully utilized as a workshop and storage space, while the interior fitting appears to still be in progress.
Wall covering around existing facilities
Next to the door, you can see a white electrical box and grey surface-mounted switches or sockets against the OSB wall. In other places, parts of the original horizontal wall shelves remain visible. So, you don't necessarily have to cover every surface to achieve a cohesive result. At Koen's, the large OSB surfaces primarily form a calm backdrop for the practical layout.
Handmade, with wood cut to size from OPMAATZAGEN.nl
Koen realized this wall cladding entirely by himself. OPMAATZAGEN.nl took care of cutting the OSB 3 panels to size. This way, you start with panel sections tailored to your own plan and don't have to make all the large cuts on site. Especially in a garden shed, where your workspace quickly fills up with materials, that is a pleasant simplification.
Do you want to create a similar project? Then measure each wall individually and draw out the panel layout in advance. Take the door, existing pipes, and electrical provisions into account. By planning the seams beforehand, you can align the panels with the available wooden fastening points.
Why clad your garden shed yourself?
With a DIY interior, you decide for yourself which walls to tackle and where to leave the original wooden finish visible. You also choose the material and dimensions according to your usage: primarily storage, regular DIY projects, or a combination of both. Koen’s project shows that you don’t need a complicated construction for this.
You also keep better control of your budget if you create a materials plan in advance. You can order sheets specifically, avoid unnecessary pieces, and carry out the installation yourself. Having them cut to size mainly saves you sawing work; the final cost depends on your choice of sheet, dimensions, and required fastening materials.
Practical tips for OSB wall cladding
Allow the panels to acclimatize in the room where you will be using them before installation. Ensure a dry, level surface and adequate ventilation. Wood-based panels can expand and contract due to changes in humidity. Therefore, provide the expansion space prescribed by the panel manufacturer, both at joints and, where necessary, between the panels.
Check where pipes and cables run before you start screwing. Keep electrical cabinets and connection points accessible, and have any modifications to the electrical installation carried out by a qualified electrician. If you notice signs of moisture on the existing garden shed, address the cause first before covering those parts.
The board material used: OSB 3
OSB 3 is a wood-like board consisting of directionally oriented wood chips compressed with a binder. For your wall cladding, this offers a recognizable, lively wood structure and a generally budget-friendly finish. The material is easy to saw and screw into place, making it suitable for custom work in your garden house. OSB 3 is intended for use in conditions where temporarily higher humidity may occur, but it is not waterproof. Therefore, protect the boards against direct water and prolonged moisture exposure. This way, you choose a practical interior cladding that complements the work-oriented character of Koen's garden house.
Tip! Also check out our handy DIY tips!
Step by step guide
Preparation
- Precisely measure all walls and partitions, install splash guards.
Montage
- Screwing the OSB boards to the beams and support posts of the garden shed
Finish
- Attaching bicycle hooks and racks.
What's in your project?
- Included: Complete kit incl. fittings and instructions
- Included: Design via 3D configurator
- Included: Fully made to your own measurements
- Not included: Edge finish of your choice
- Not included: Round or curved shapes also possible
- Not included: Each part available in a different wood type
Made-to-measure self-build kit
Prefer a complete kit? Design your furniture in our 3D configurator and receive all parts, fittings and instructions in one package.
- Not included: Complete kit incl. fittings and instructions
- Not included: Design via 3D configurator
- Included: Fully made to your own measurements
- Included: Edge finish of your choice
- Included: Round or curved shapes also possible
- Included: Each part available in a different wood type
Inspiration cutlist
Want to make this DIY project? Check out Koen's saw list and complete your order easily.
Materials used

Total price
€ 397,40
Add Koen's cutlist straight to your cart
My experience with OPMAATZAGEN.nl
Order
Delivery
General experience